Lessons learned from my first year in the new kitchen garden
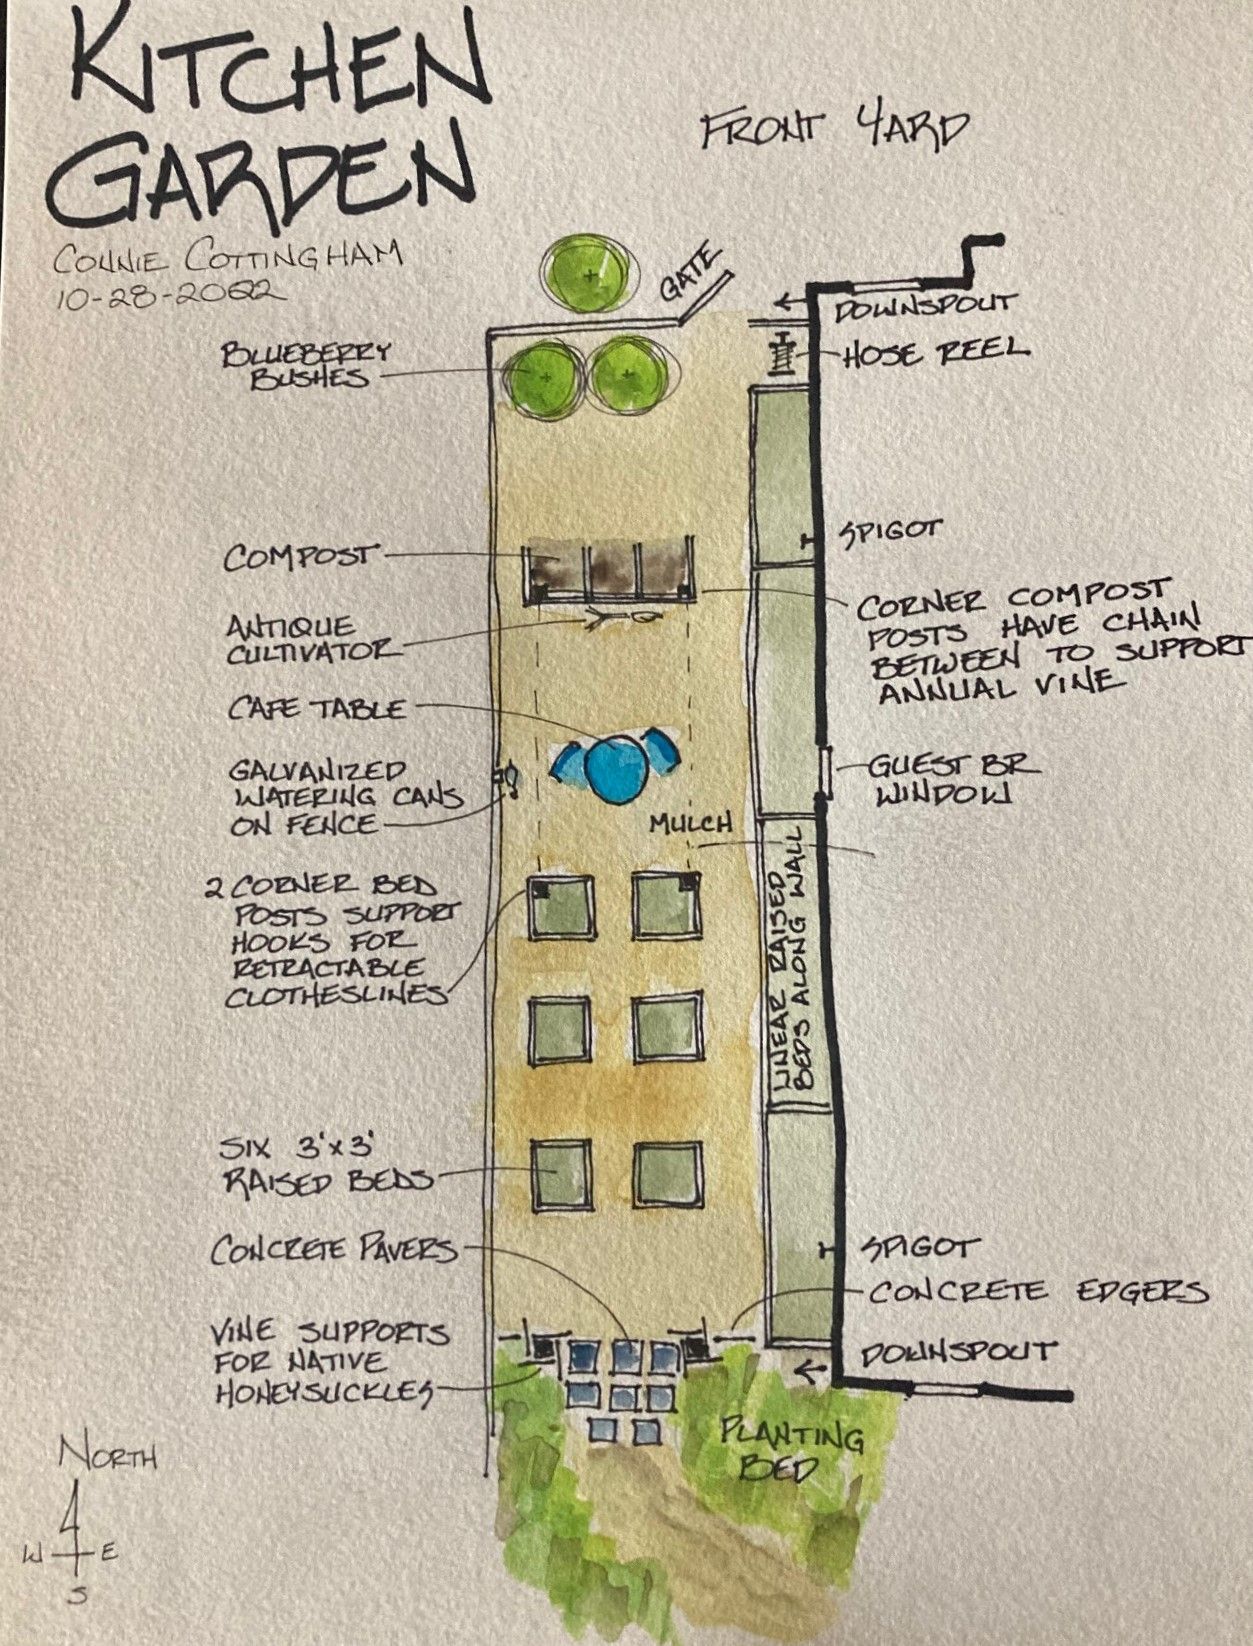
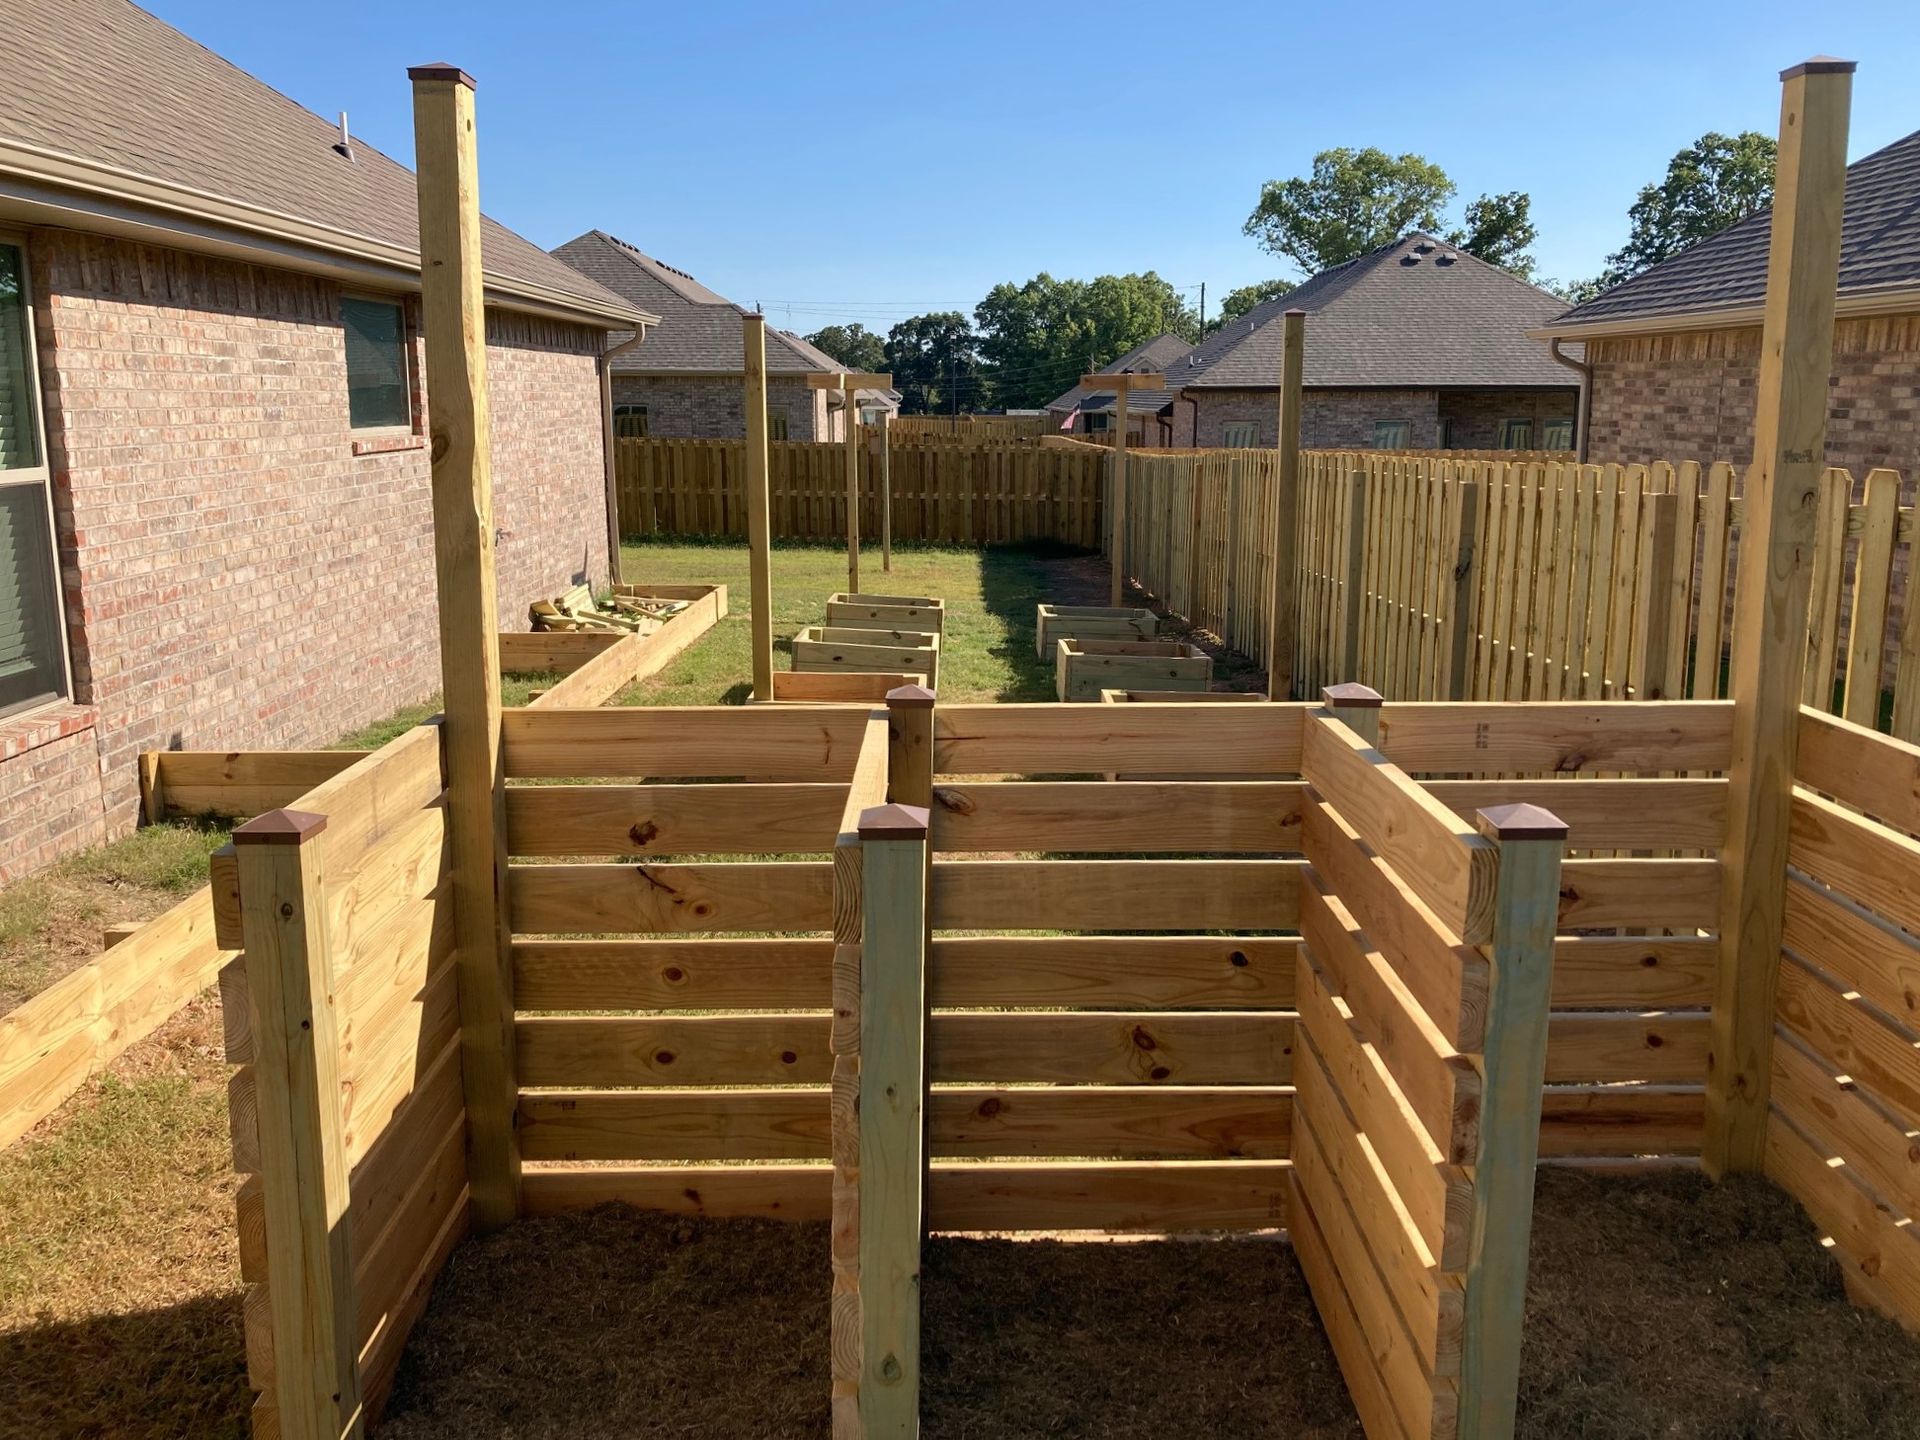
2023 was my first full year in my new home and my kitchen garden on the west side. This is a sketch of my garden plan, with the beds and posts built as my fence was being installed. Overall, I am thrilled with the design and decision. I thought I would share some of the things I learned from doing this.
It was totally worth the money to me.
Emphasis on the ‘to me’. We all have different priorities. I see this house as a 25-year commitment, and this garden and fence as part of my house construction costs. I see years of enjoyment and discovery and fresh veggies from this space. I do not look at cost per harvested vegetable. The compost pile was frightfully expensive, but one of the most important parts to me and already providing soil this lot completely lacked.
Eight-foot posts added so much to this garden.
There are 3 pairs of eight-foot high 4×4 posts in this garden, each pair with a different top design and all with a copper cap. The pair on the corners of the compost pile have holes drilled in the top to install a black chain to support an annual vine (an annual vine can be completely cleared away each year). They each also hold a retractable clothesline.
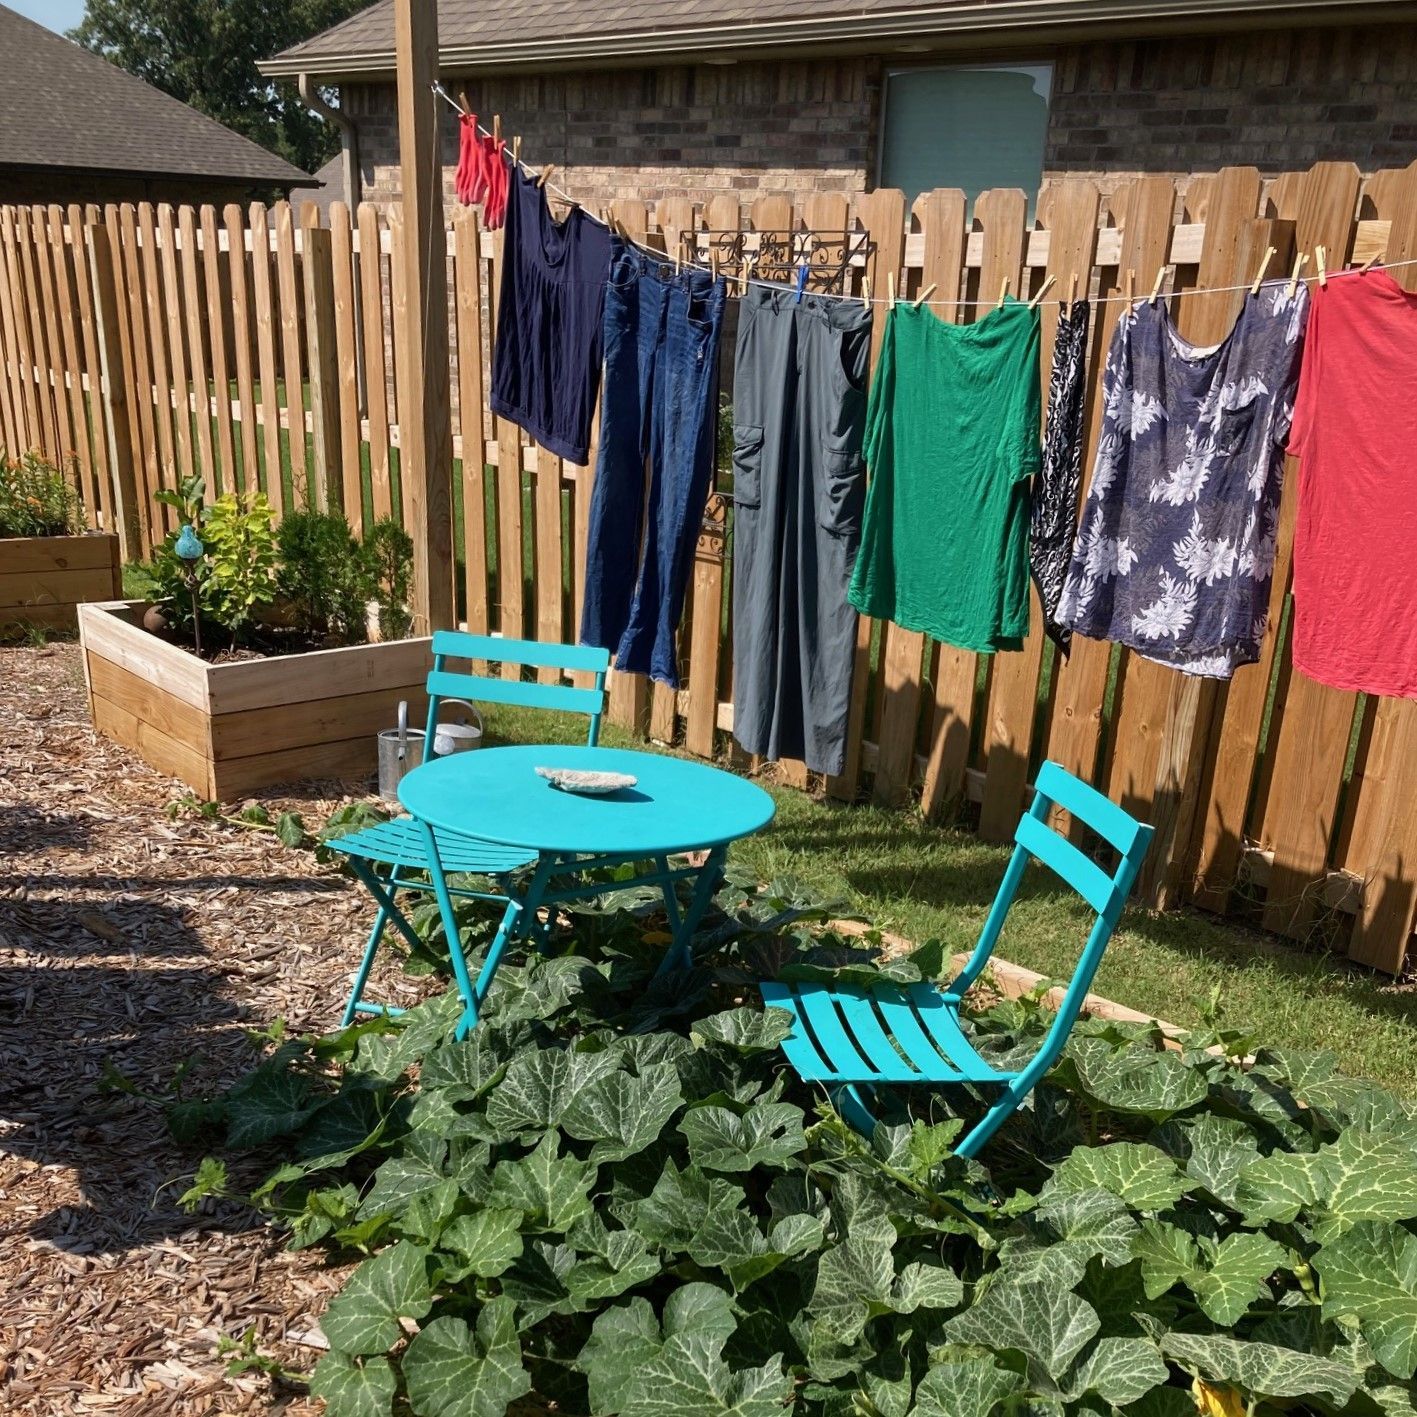
The pair on two raised beds have hooks to hold the ends of the clotheslines, which have been used a lot this year. Those hooks also can hold twine that stretches up from the bed to support beans or peas.
The pair at the entry supports native honeysuckle vines, evergreen and very attractive to hummingbirds, bees and butterflies. The vines have already reached the top of the posts and should fill out next year. Similar posts are outside two windows, holding feeders to bring birds and hummingbirds into view. Another holds a bluebird box that had a nesting pair last year. Four more support an arbor that blocks the view into neighbor’s windows. These posts, which required professionals with the right equipment to install in the compacted fill, were all very much worth adding to the landscape.
I should have checked the weep holes before deciding how high to build the beds along the brick wall.
Honestly, why did the fence builders not mention this? It’s really not a big deal, because soil never covered any weep hole. Because of the lot slope, I could place only an inch or two of soil in one end of the 70’ wall (fine for strawberries and iris), yet several inches of soil in the other end (better for roses, blueberries, and bigger perennials). The four terraced beds were all built at the same height, so the front bed was built higher than it needed to be and now requires me to step over the side and onto a flat stone to reach my spigot.
Four of the 3′ square beds were built in a way that anyone could DIY.
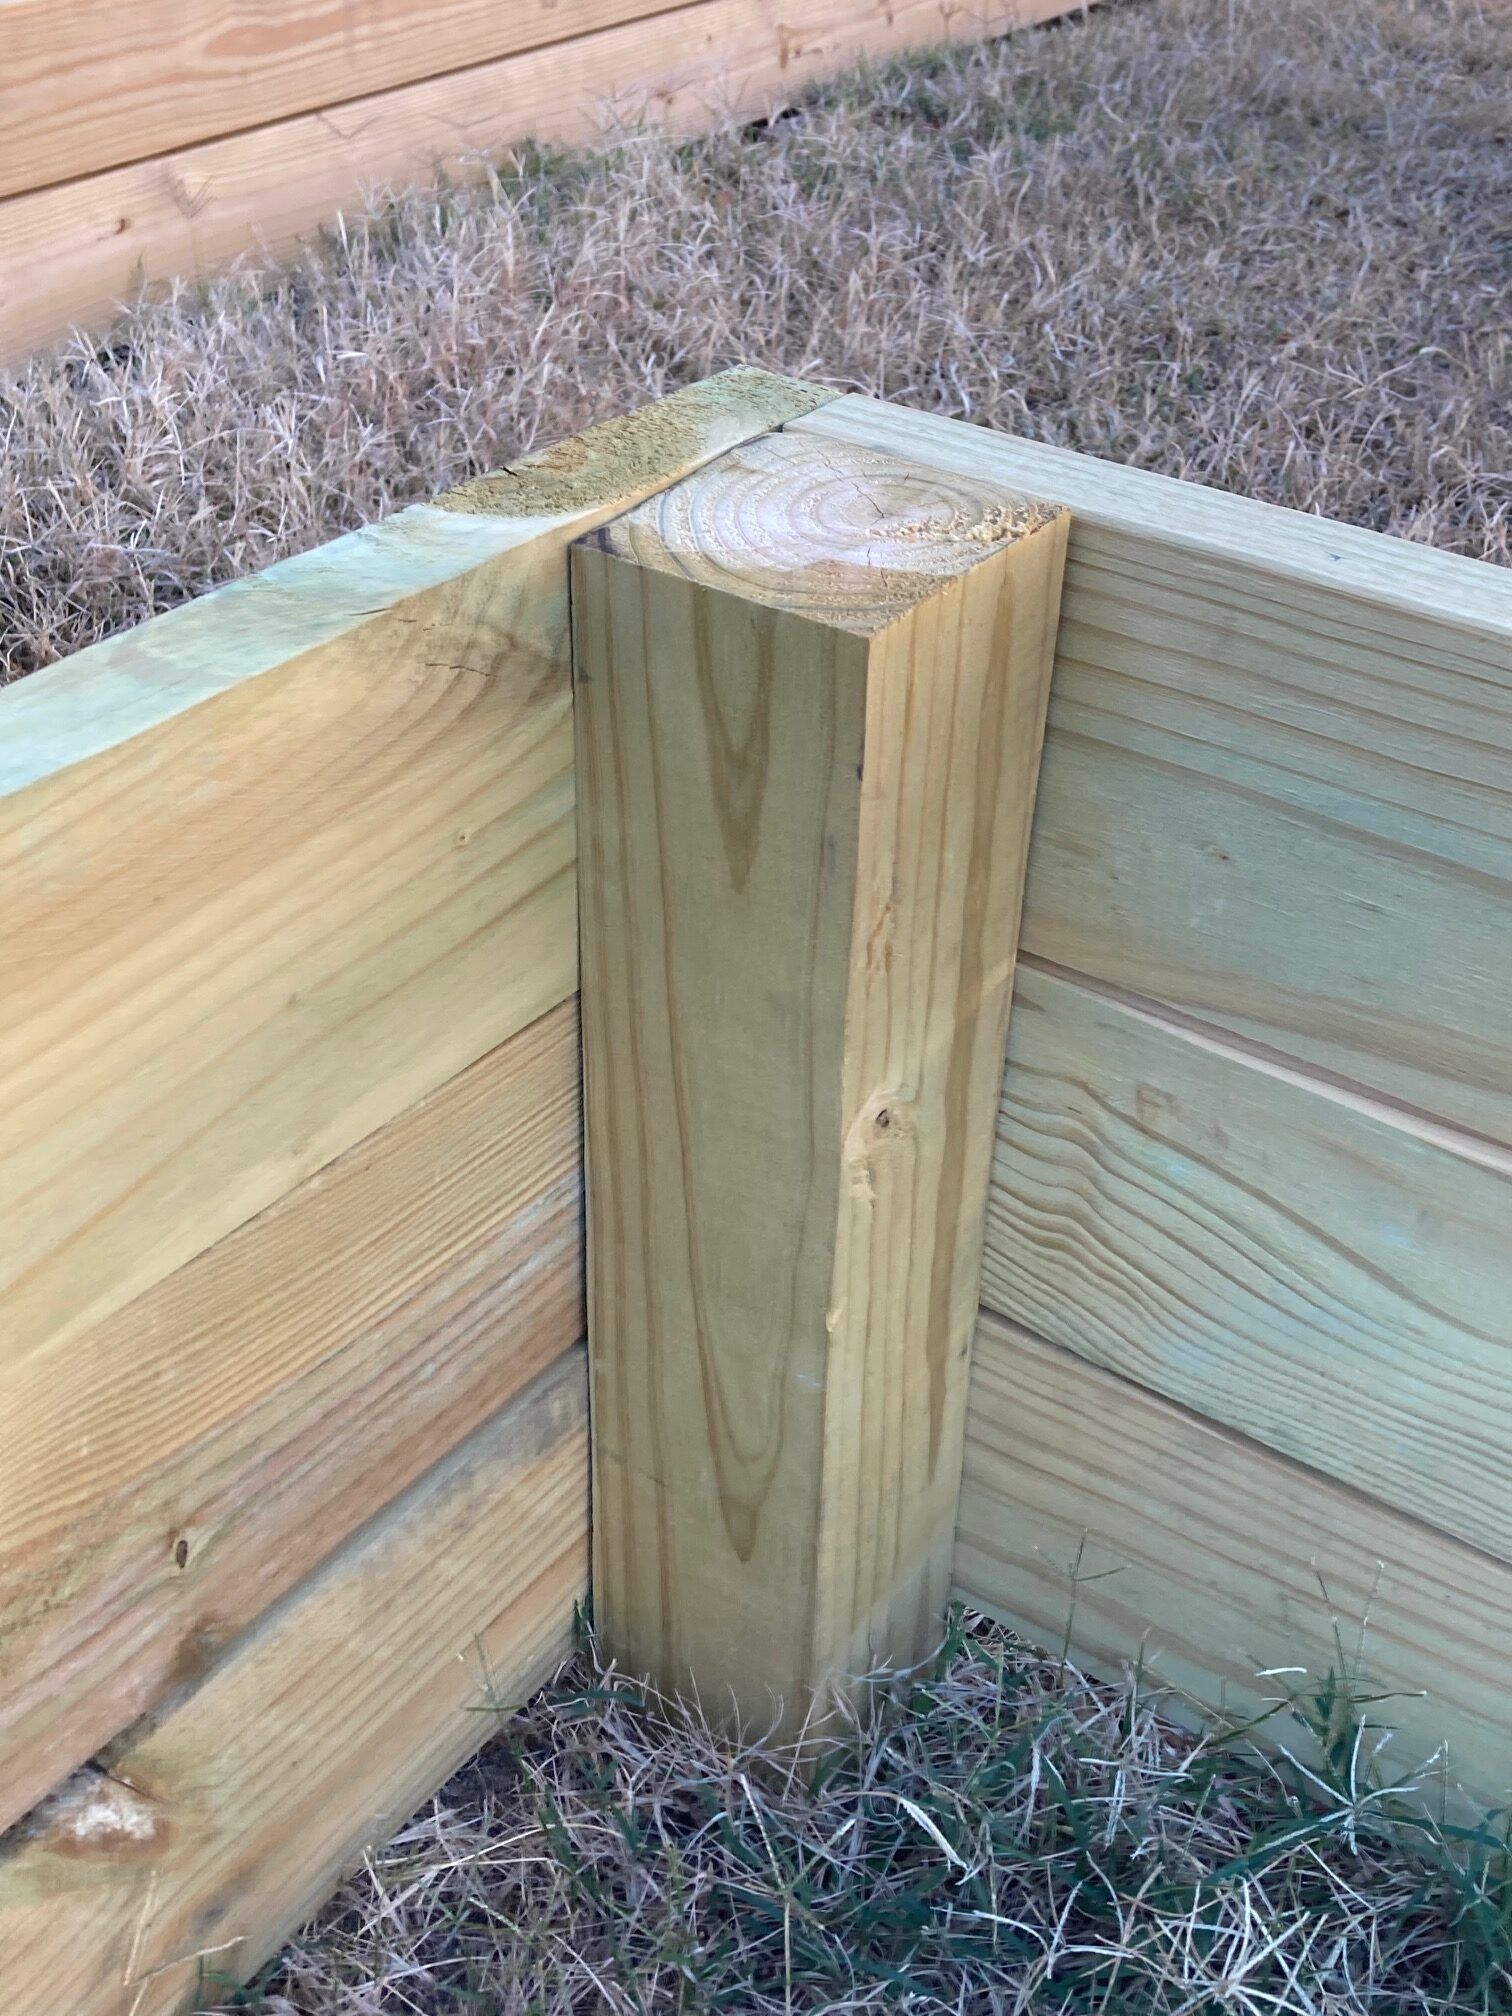
The two beds with eight-foot posts are built around posts placed in the ground. But the others were built with 4x4s and 2x6s and put into place after they were created. Many people, even I, could build these beds themselves. Or you could add raised beds to a fence contract and decide exactly where they would be placed later. Mine were placed on top of flattened moving boxes to smother the Bermuda grass below. The paths between were covered with flattened moving boxes and topped with bark mulch. That was an effective way to kill the Bermuda sod. Weeds in the path can be pulled or spot-sprayed without disturbing vegetables in the raised beds. The mulched paths look attrative and are easier to maintain than mowing and trimming.
Don’t ignore surface drainage, maintenance needs or your neighbors.
The drainage on this side of my lot already flowed along the property line, so I left 2-1/2’ of Bermuda sod along the fence. This (1) let the surface drainage flow as it had without erosion, so my neighbor did not get any additional water (2) gave me enough room to mow that strip with two passes of my mower, (3) let me define the edge of my mulched area and (4) allowed airflow around the wooden fence and space to maintain it and (5) backed up my veggies a bit from anything that my neighbor’s lawn service might spray (they also spoke to their lawn service for me).
The raised beds have 3’, 4’ and 6’ paths around them, enough room to maneuver my wheelbarrow. The large space for the clothesline also created an area for a table and chairs and some large planters (even accommodated the renegade butternut squash that emerged from the compost pile).
Other lessons:
The west side of the house has shade in early summer mornings, much better for gardening than afternoon sun.
Wonderful surprises grow out of compost piles. 2023 brought potatoes and butternut squash.
Raised beds are great places to hold small ornamental plants while you are waiting to find a permanent home for them.
Root vegetables love big containers and raised beds.
Nobody steps on plants in raised beds, including you.
Placing house numbers on the sides of the raised beds help me document what I planted where.
Hanging watering cans on the fence was cute – until the wind loudly banged them around in the middle of the night and they caught water every time it rained. They were replaced with a thrift store mirror.
